Build Your Own Garden Planter Boxes

Build Your Own Garden Planter Boxes
Embracing the DIY Spirit with Garden Planter Boxes
Garden spaces have always held a special charm for me, and investing time into DIY projects can add both beauty and functionality to an outdoor area. I’ve stumbled upon that building your own garden planter boxes is a great way to step up curb appeal, create a cozy atmosphere, and bring a touch of greenery to patios and gardens. In my experience, the process is not only rewarding but also allows plenty of room for creativity and personalization.
Choosing the Right Materials for Your Planter Boxes
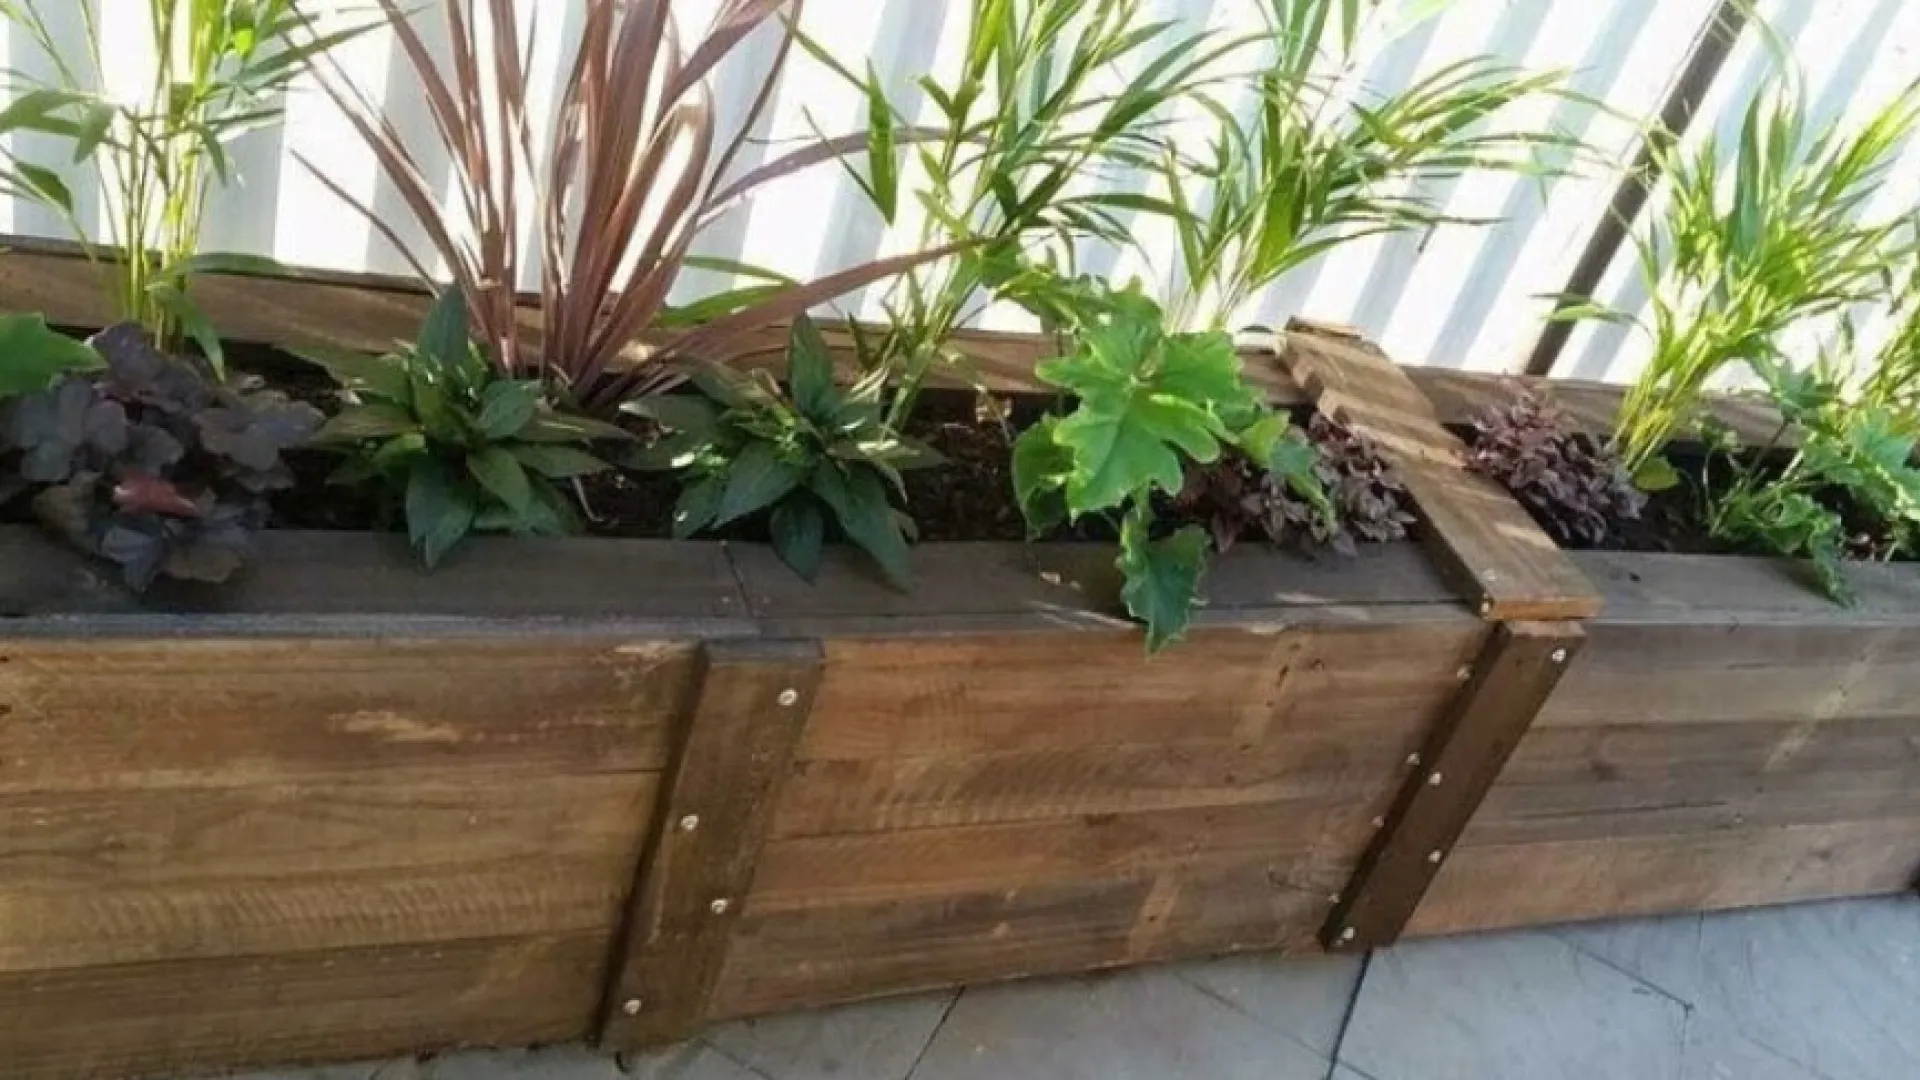
One of the most exciting parts of building your own planter boxes is selecting your materials. I like to think about the durability and sustainability of each option. Wooden pallets that have been upcycled or reclaimed wood like cedar and redwood are excellent choices. They’re naturally robust and resistant to pests and decay, which is very important whether you’re in a dry region or facing unpredictable weather.
The appeal of reclaimed wood is that it not only looks rustic and inviting but also promotes eco-friendly building practices. Using sustainable materials helps reduce waste and often comes at a lower cost compared to buying new lumber. For projects in warm climates, I recommend seeking out woods that can cope with heat and occasional moisture. Using weatherproof paint or sealant on the wood will step up its longevity, while also letting you infuse a bit of personal style. Personally, painted boxes add a fun twist and make the outdoor space feel unique.
Planning Your Design and Layout
Good planning is a cornerstone of any DIY project. Before I started building my planter boxes, I spent time sketching designs and mapping the dimensions of the space where they would go. I recommend measuring your available space carefully so that the boxes fit perfectly without overcrowding your garden or patio.
Think about what plants you want to house in your boxes. Many people, including me, find that herbs work exceptionally well in planter boxes; basil, mint, parsley, and rosemary are popular choices. If you prefer native plants that are suited to your local conditions, choosing them can be both practical and eye-catching. The selection of plants will affect the depth and width needed, so planning ahead with a clear sketch helps achieve the right proportions.
Having your design mapped out on paper gives you a clear roadmap. I always note dimensions, design elements, and any special features I want to include, like drainage holes or even built-in seating. Once you have a reliable plan, the building process becomes much smoother.
Step-by-Step Guide to Building Your Garden Planter Boxes
At first, building your own garden planter boxes can feel overwhelming, but breaking it down into clear, manageable steps really helped me simplify the process. Here’s a guide that worked well:
Following these steps, you can create a beautiful planter box that reflects your style and fulfills your gardening needs. The process is accessible, even for beginners, and offers a practical lesson in both construction and design.
Gather Your Tools and Materials: Begin by collecting everything you need, including the wood, screws or nails, weatherproof paint or sealant, and basic tools like a saw, hammer, drill, and measuring tape. Having your tools ready before starting avoids unnecessary delays.
Cut the Wood to Size: With your design in hand, measure and cut the wood according to the dimensions of your planter box. Double-check your measurements to ensure accuracy; a precise cut helps the box fit together smoothly.
Assemble the Box: Arrange the wood pieces to form a rectangle or square. Secure the joints tightly with screws or nails. If you’re new to woodworking, taking extra care to align pieces correctly is very important. Adding extra supports for larger boxes or those meant to hold heavier loads can be a smart move.
Create Drainage: Healthy plants depend on proper drainage. Drill several holes in the bottom to let excess water escape. This simple step prevents water from pooling, which in turn protects the wood from decay.
Prepare the Site: Position your planter boxes in the desired location. It’s essential to level the surface so the box sits evenly. A stable base not only supports better plant growth but also prolongs the life of your creation.
Fill with Soil and Plant: Once the box is positioned, fill it with quality soil. I usually mix in some compost to boost fertility. Then, plant your chosen herbs, flowers, or native plants. This final touch transforms a simple wooden box into a thriving garden feature.
Troubleshooting and Common Issues
While building planter boxes is generally straightforward, I encountered a few challenges that might affect you as well. Knowing these potential issues ahead of time makes troubleshooting much easier if something doesn’t go as planned.
Uneven Cuts: One frequent issue can be unevenly cut wood. When this happens, corners may not line up properly. Taking the time to measure twice and cut once can help avoid frustration.
Loose Joints: If screws or nails don’t hold firmly, the structure can wobble. Reinforcing corners with extra brackets or using sturdier fasteners usually fixes the problem. Finishing with a sealant not only protects the wood but also gives additional rigidity.
Drainage Problems: Sometimes, the drainage holes might not be sufficient during heavy rains. If water pooling occurs, consider enlarging or adding a few more holes to help water flow freely.
Weather-Related Wear: Prolonged exposure to harsh weather can cause wood to warp or deteriorate. Applying a protective sealant is a quick fix that dramatically improves durability.
Addressing these issues early on streamlines the building process and helps ensure that your planter box remains sturdy and attractive even under challenging conditions.
Creative Customizations and Advanced Tips
After mastering the basics of construction, adding custom touches can be a lot of fun. Here are a few ideas to jump into once you’re comfortable with your standard design:
Add Decorative Touches: I enjoyed painting my planter boxes in bright colors or subtle pastel shades that mix well with the surrounding environment. Weatherproof paints maintain their color over time, and stenciled patterns or natural finishes that highlight the wood grain can make the design truly unique.
Incorporate Multi-Level Designs: For an eye-catching garden scene, consider building boxes with multiple levels. I experimented with stacking boxes to mimic a tiered garden layout. This design not only optimizes space but also allows various types of plants to thrive under different sunlight exposures.
Integrate Functionality: It can be very exciting when planter boxes serve more than one purpose. Adding elements like built-in seating or a small trellis attached to the box creates a piece that is both practical and appealing. For limited spaces, consider designs that can be rearranged with ease.
Use Recycled Materials: Creativity doesn’t end with wood. Integrating recycled metal edging or glass accents can give your project a distinctive look. Sometimes a quick visit to local recycling centers or salvage yards provides materials that are perfect for adding that extra flair.
These advanced tips transform a simple project into a personalized and stylish addition to your outdoor space. Experimenting with different ideas allowed me to express my creativity while also creating functional garden features.
Frequently Asked Questions
Question: I’m new to DIY projects. Is building a garden planter box too challenging?
Answer: I started with small, simple boxes, and breaking down the project into clear steps made it manageable. With a bit of patience and attention to detail, even beginners can build sturdy, attractive planter boxes.
Question: What type of wood works best for planter boxes?
Answer: In my experience, cedar or redwood yield great results because they naturally resist rot and pests. Reclaimed wood or upcycled pallets are also very popular among those interested in sustainable building.
Question: How do I ensure proper drainage in my planter boxes?
Answer: Be sure to drill multiple holes in the bottom of the box. In areas with heavy rainfall, adding a layer of gravel can also help water flow out smoothly.
Question: Can I customize the size and shape of my planter boxes?
Answer: Absolutely. One of the best aspects of building your own box is the ability to tailor its dimensions to your garden’s layout. Sketching a design that fits your space and plant choices makes the process that much smoother.
Final Thoughts
Building your own garden planter boxes is a fantastic project that adds practicality and charm to your outdoor area. It blends creativity with function and gives you a hands-on experience that also encourages sustainable practices.
The process taught me the importance of careful planning, choosing the right materials, and preparing for common challenges along the way. Each step—from gathering tools to adding that final coat of weatherproof paint and arranging your plants—contributes to a satisfying outcome.
If you’re thinking about starting this DIY adventure, remember that every planter box you build is a testament to your creativity and commitment. It isn’t just about constructing a box. It’s about creating a personal space that connects you with your garden, and that can truly improve your surroundings. Start small if needed, and then gradually explore bigger, more inventive designs as you gain confidence and skill.
At the end of the day, DIY garden projects offer endless possibilities. They let you experiment with colors, shapes, and plant arrangements, all while giving you a rewarding sense of achievement. Enjoy the process, learn from any setbacks, and let your garden—and your creativity—grow with every project.
Keep Reading

Strata Secrets – What To Know Before You Buy
Education
Build Your Own Garden Planter Boxes
 Information